2: From color theory to code
This part of the tutorial shows a way of translating knowledge about color theory to a working algorithm in code. It gives a couple of examples of the implementation of different color schemes. For the purpose of this tutorial, I will be using a color model that utilizes a hue channel, and my code examples will use HSL. I explain the reasons for that in the previous part.
All algorithms in this part use Unity's native Random.Range function to input variables. Examples for using input instead of randoms are shown in the next part.
You can find all used code and an example scene in this Unityproject.
Hue
When thinking of the relationships between hues in a color palette, be it in a painting, a user interface, or a 3D environment, some basic color theory comes to mind: complementary colors, analogous schemes, and so forth. Often, seeing and understanding these relations and patterns between colors come natural to our human brains, but translating them to an algorithm may require some steps. I recommend using variables that represent visual aspects of the color palette (for example the main hue, the shift between hues, and similar variables for saturation and lightness), to keep the code more similar to the color theory (and make it easier to talk about it with artists you might be working with).
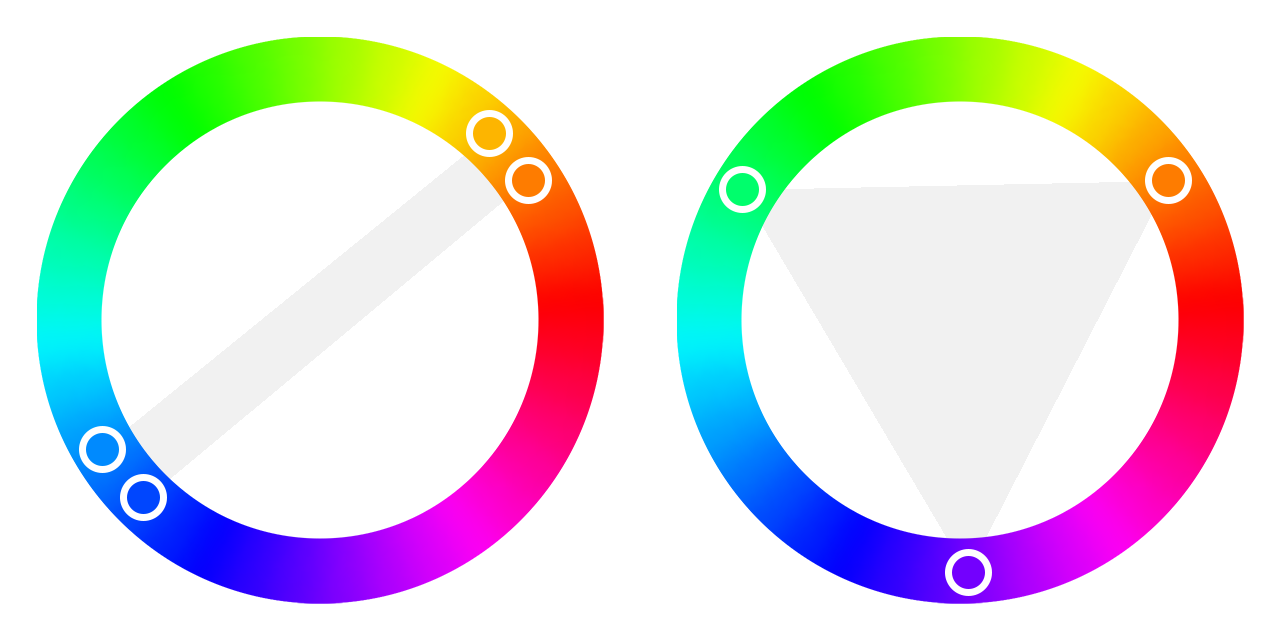
A way that helps translate a color scheme to code is first determine its pattern on the hue wheel, and then roughly visualize the graph that it would need to follow to create that pattern.
Writing the code then becomes roughly as complex as the shape of the graph.
An example of an easily translated scheme is the analogous color scheme, in which the graph is quite linear with equal steps. This is easily coded:
mainHue = Random.Range(0f, 1f);
hueShift = Random.Range(-.1f, .1f);
for (int i = 0; i < 6; i++) {
}
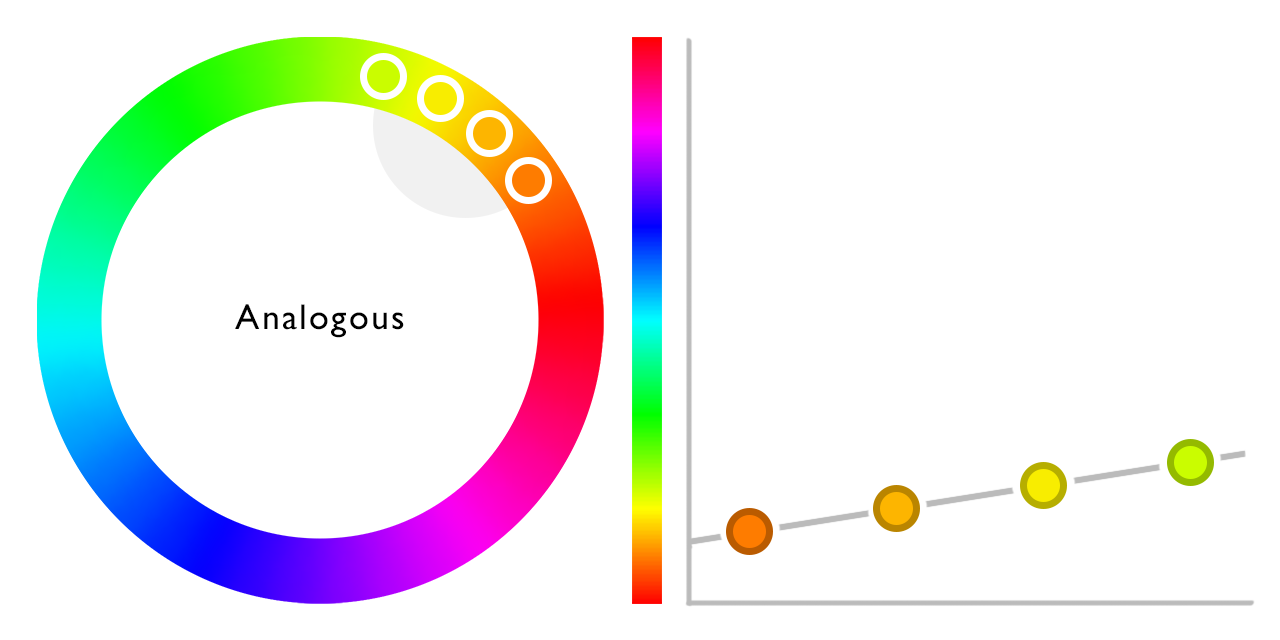
The above code generates a color ramp in which every color is a random but equal distance from the main hue, which is also generated randomly. Now, the nice thing about the hue wheel is that, as it is round, values above 1 or below 0 can be remapped by, for example, using Unity's Mathf.Repeat function or some modulo magic. That means that a color scheme like the complementary scheme can use a calculation that is not much different from that of analogous, it simply raises the hueShift variable by .5f.
mainHue = Random.Range(0f, 1f);
hueShift = Random.Range(-.1f, .1f) + .5f;
for (int i = 0; i < 6; i++) {
}

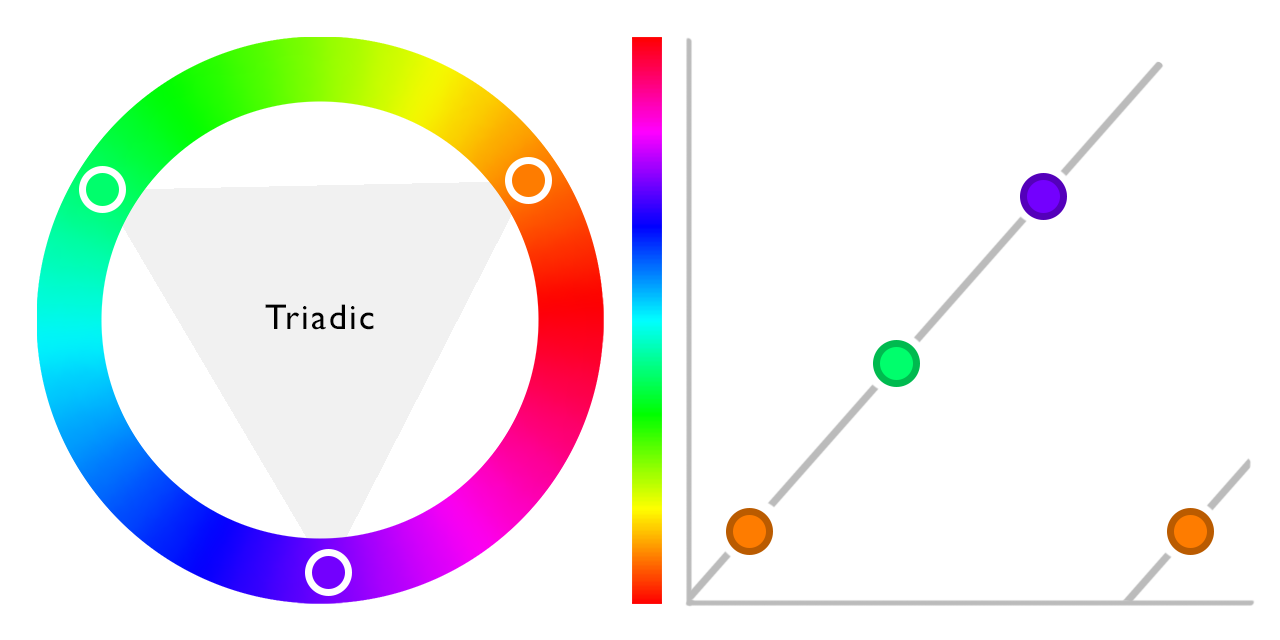
Varying the value which raises the hueShift variable has impact on the color scheme. The triadic scheme is coded practically the same.
mainHue = Random.Range(0f, 1f);
hueShift = Random.Range(-.1f, .1f) + .33f;
for (int i = 0; i < 6; i++) {
}
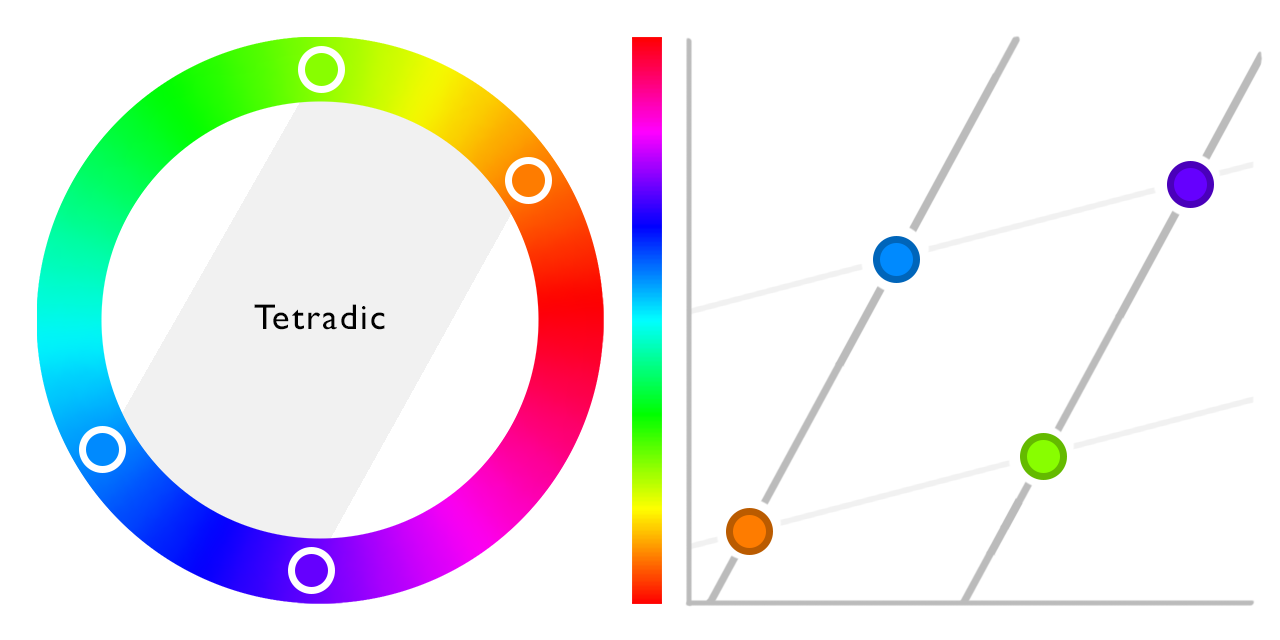
Now, it gets more interesting as the graph gets less linear, for example in a tetradic color scheme. This one switches between bigger and smaller steps, which can be simulated through a couple of things. There's obviously things like sine waves and Unity's Mathf.PingPong, but what I like to use is %2 on the value of the for-loop.
mainHue = Random.Range(0f, 1f);
hueShift = Random.Range(.1f, .3f);
for (int i = 0; i < 6; i++) {
}
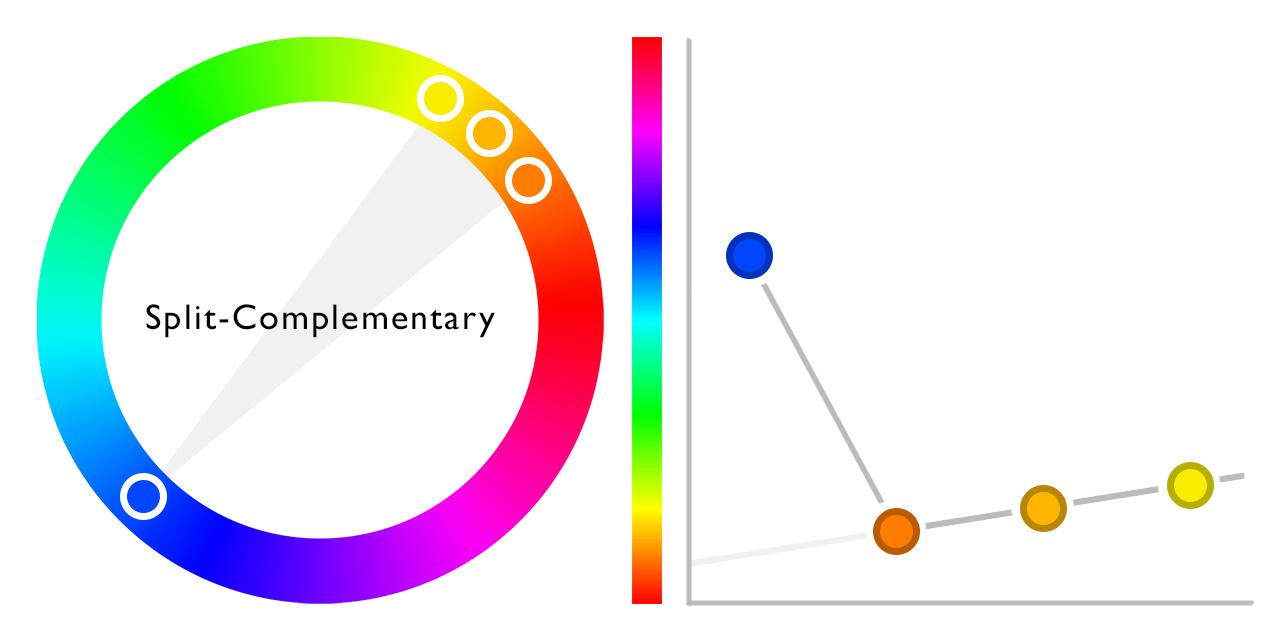
Other more complex types of color schemes are, for example, split complementary schemes. For these schemes, the code is somewhat less generic:
mainHue = Random.Range(0f, 1f);
hueShift = Random.Range(0, .3f);
colorPalette[0].h = Mathf.Repeat(mainHue + .5f, 1);
for (int i = 1; i < 6; i++) {
}
Saturation and Lightness
Besides having varying hue values, most palettes also include shifts in saturation and lightness to some extent.
A basic way of utilizing this is, much like in the analogous hue scheme, starting at a base value and linearly shifting away from that.
For saturation, it makes a lot of sense with many palette schemes to shift from a higher value towards zero, which makes the first color the brightest, and the last the greyest.
Doing that allows you to know for sure which of your colors is most intense, and use this knowledge to apply it to the objects that require most attention.
Extending this to the lightness value means starting somewhere around .5, and then either lowering the value towards black or heightening it towards white.
Doing one or the other will make for a clear palette, but switching between the two within the same palette can also give interesting results, and might work better with some hue schemes than others.
Linearly changing both the saturation and lightness of the color is not very different from the analogous hue scheme:
mainSaturation = 1 - Random.Range(0, .6f);
saturationShift = mainSaturation * Random.Range(.2f, 1);
mainLightness = Random.Range(.3f, .7f);
lightnessShift = Random.Range(-.1f, .1f);
for (int i = 0; i < 6; i++) {
}
In most color palettes the shift in saturation and lightness are not just randomly implemented without adapting to each other. A fairly simple way to make the two values be more coherent, is by heightening the saturation when the color is really dark or really light. An example of how this can be done is this:
saturationShift = mainSaturation * Random.Range(.2f, 1);
mainLightness = Random.Range(.3f, .7f);
lightnessShift = Random.Range(-.1f, .1f);
for (int i = 0; i < 6; i++) {
}
Instead of linearly interpolating the saturation and lightness, they could also be changed exponentially for example, or anything that would work for your purpose.


